Exposure Triangle: ISO And Its Uses
The exposure triangle is one of the first things a photographer must learn to create properly exposed images. ISO is one side of that triangle. You must understand ISO and the effects of using it to balance the triangle, which is usually confusing in the beginning.
It is imperative that you understand what the exposure triangle is all about. There will be a lot of times where you need to go back to it again and again to take the shot you want. One of the main reasons why you need a solid understanding of this that photography is all about light.
This makes exposure critical in all your shots because everything is about light. The better you capture and control light, the more you will love the outcome of your shots. This is just one of the many reasons why the exposure triangle plays a crucial part in your photography. This is a three-pronged approach and the first one is ISO.
What is ISO
The digital sensor in your camera has ISO ratings. ISO is the measurement of sensitivity to light that that sensor has. Lower ISO means less light sensitivity and conversely, high ISO means higher sensitivity to light.
ISO is usually easier to understand since it consists of only three letters. It is also the first side of the exposure triangle we will talk about because it is commonly the first one you set. In the days of film cameras it was referred to as ASA, or American Standards Association, and it referred to the industry norm for light sensitivity when it comes to emulsion-based film. Later it was changed to ISO, which simply means International Standards Organization.
How does it affect light?
Exposure triangle is all about light and what your ISO does is help you brighten or darken your shot. Sound pretty easy to remember because it has a straightforward function. However, your ISO works in conjunction with two other camera functions – shutter speed and aperture. These three make up your exposure triangle.
Going back to the question, it is part of the exposure triangle because it can control the amount of light based on sensitivity of the sensor. The higher your ISO, the more sensitive it will be to light and the more it brightens up your shot. On the other hand, the lower the ISO makes your camera less sensitive to light. This, in turn, produces darker images.
When to use high and low ISO with the exposure triangle
Now that you have an idea what it does, when do you crank up your ISO and when do you keep it as low as possible?
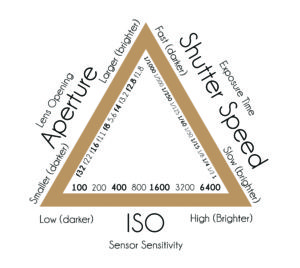
The triangle shows the relationship between ISO, aperture, and shutter speed. A smaller smaller aperture is usually desirable in landscape photography. One of the situations where you might need a high ISO is when you are trying to take shots with a small aperture in a dark environment. Increasing the ISO can help you gather as much light as you can. This can help you get the shot that you want.
However, as you do this, you also introduce grain or noise into your image. These are small specks or dots in the photo that is visible when you blow up the image. If you want to retain crisp and clear shots, the idea is to work with a low ISO as possible. There are even some professional photographers who would tell you that your ISO is the first thing you adjust in your exposure triangle and you forget about it. You then use your aperture and shutter speed to creatively control light in your shots.
As stated earlier, the goal is to keep ISO as low as possible. You must consider the exposure triangle when setting up your shot. For example, you may need to sacrifice some depth of field by using a large aperture to keep your image from having too much noise. The first consideration of any shot should be ISO. Where does it need to be to get the rest of the triangle where you want it. Will the image suffer from high ISO noise to keep the other settings where you want them? Consider ISO carefully when you exercise the exposure triangle.
Common ISO values?
ISO values are pretty common all throughout camera makes and models. The reason for this is that ISO is a standard component for most cameras in the market. Sensors in entry level cameras will not be as tolerant to high ISO settings. Additionally, full frame cameras tend to have higher ISO capability in their sensors. Here is a sample of a common set of ISO values or speeds you can find in most cameras.
- ISO 100 (low ISO)
- ISO 200
- ISO 400
- ISO 800
- ISO 1600
- ISO 3200
- ISO 6400 (high ISO)
There are some high-end cameras which can give you expandable ISO values making it ideal for dark environment. What you need to remember is that once you double your ISO speed (100 to 200), you are doubling the brightness of your image. There are cameras that give you smaller increments in ISO so you can take a look at those as well.
One thing you need to identify at the onset is the default ISO level of your camera. This means that when you do not take time to adjust it, it will use that same level over and over again. It can also be your Base ISO. This is the lowest level you can put your ISO into giving you crisp images. Of course, low-light conditions means you need to adjust that up in relation to your aperture and shutter speed.
How do you adjust ISO?
As you go through your ISO setting, the next thing you need to understand is how you can adjust it whenever you need to.
- The first step is getting out of auto mode and start using the manual setting. There are also other semi-automatic modes to choose from like the shutter priority or aperture priority modes.
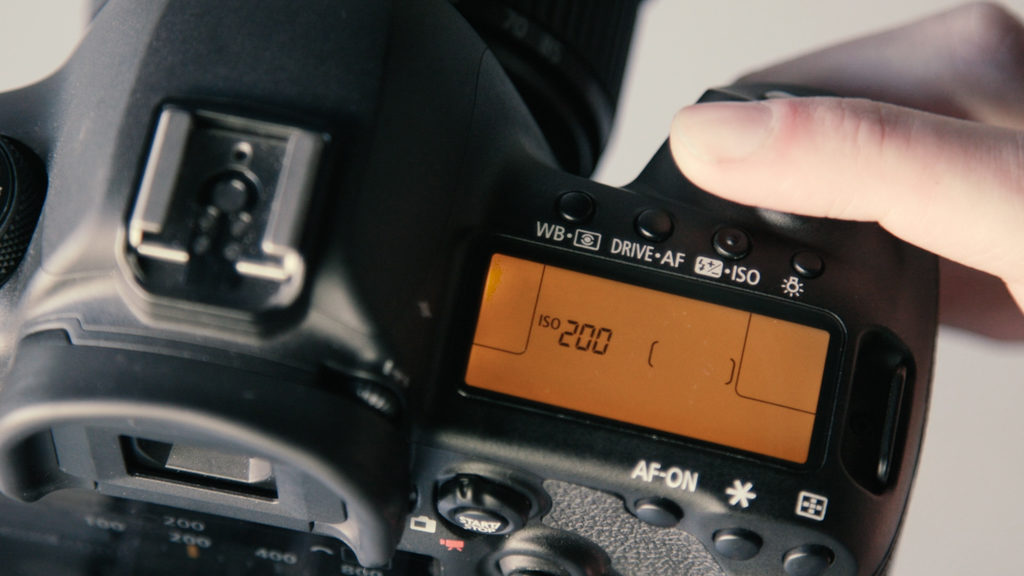
- Your ISO is usually in a menu option with its own section. Just choose it and select the ISO level you want to use.
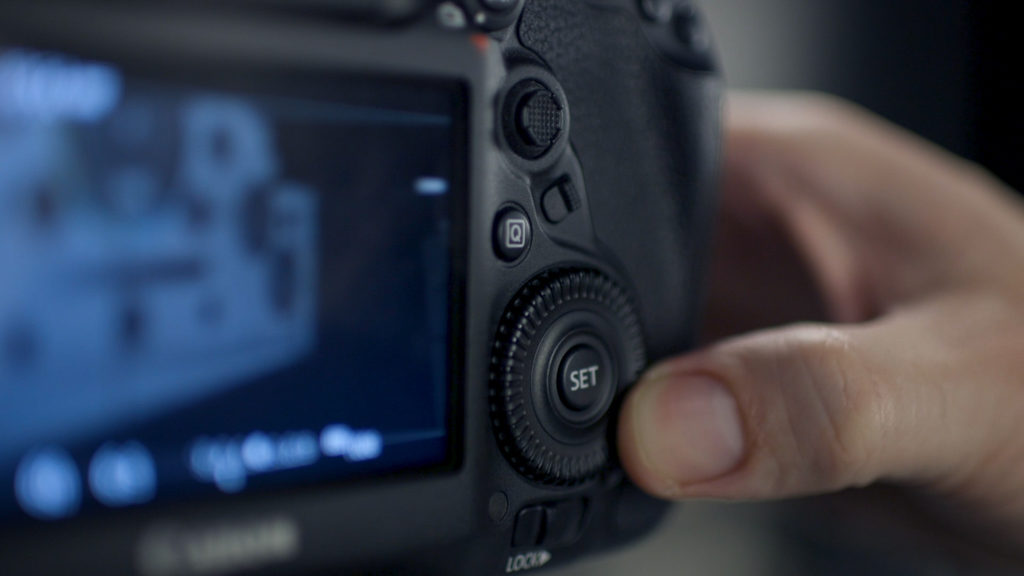
- For higher-end cameras, there is usually a button dedicated to ISO. You just need to familiarize yourself with it. Oftentimes, you simply need to press it and turn a wheel to adjust it up or down.
Get to know your camera. The idea with this is to familiarize yourself how to make adjustments as fast as possible. There may be times where you can take your time to look for it just like in a studio shoot. However, doing some street or even sports photography would require faster light adjustments. You even need to be able to do it without putting the camera down.
Summary
The exposure triangle is a very useful tool. Lean it, use it, rely on it. If there is a rule in photography that should be considered in every shot you take, it is the exposure triangle. Understanding ISO and it’s role is an important part of using the triangle. Spend some time using different ISO settings on your camera to determine noise levels. Then experiment with the other settings and learn to recognize the tradeoffs. As always, take lots of photos and critique them to see what works for you.
Previous Article: Beginner Tips For Landscape Photography
Next Article: Shutter Speed And The Exposure Triangle
List of All Articles
Leave a Reply